
Chocolate Covered Cranberry Sauce might sound a bit unexpected at first but the idea actually came to me one Thanksgiving evening when I was trying to figure out what to do with all the leftover cranberry sauce because I didn’t want to waste it. I’ve always loved the contrast of tart berries and rich chocolate so I thought why not roll them into little bites and give them a sweet glossy coating?

Ever since then it’s become a creative way for me to repurpose leftovers into a whole new dessert that looks fancy but takes barely any effort. Each bite bursts with juicy cranberry flavor wrapped in creamy chocolate and a little crunch from add-ins like nuts or crispy rice. It’s a sweet surprise that everyone ends up loving even those who say they don’t like cranberry sauce!
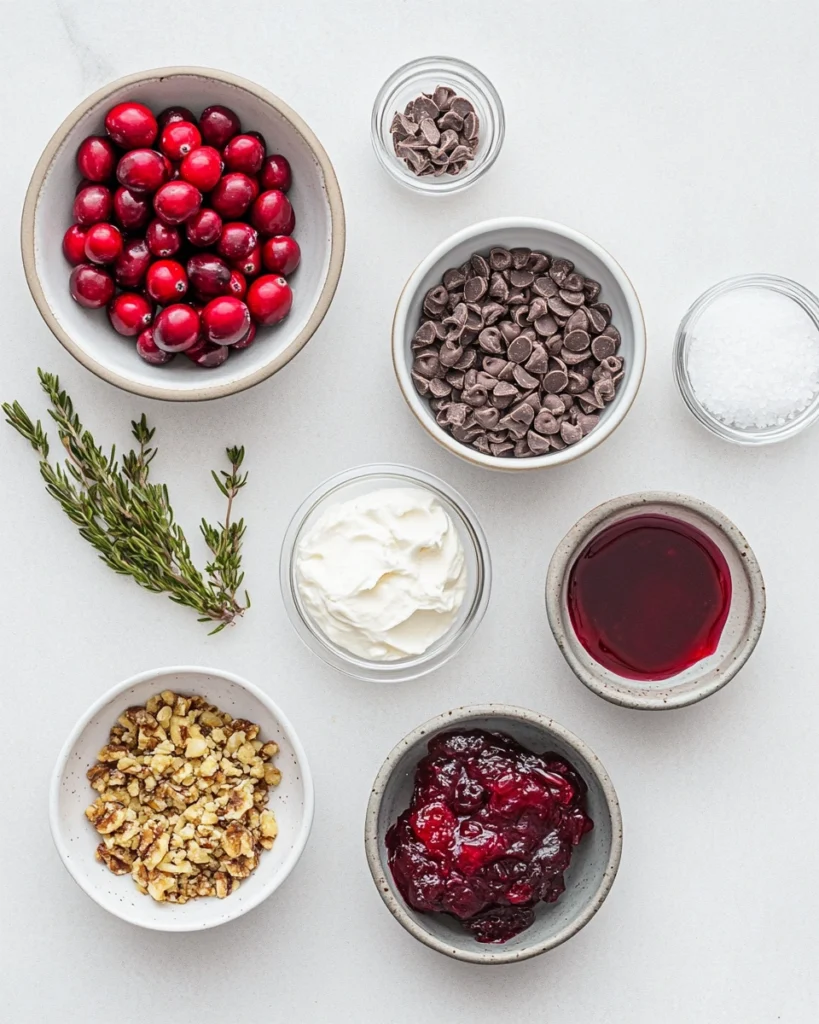
Ingredients :
Here’s what I use for this recipe. You can always make substitutions if you prefer!
- Cranberry sauce – The tangy fruity center that holds everything together
- Crushed nuts or crispy rice – Adds texture and helps firm up the filling
- Cream cheese – Binds the filling and adds a creamy contrast to the tart berries
- Chocolate chips – For melting into that smooth outer shell
- Coconut oil – Helps the chocolate melt smoothly and gives it a glossy finish
- Optional toppings – A pinch of sea salt or chopped herbs for garnish
Tools You’ll Need
- Mixing bowl – To combine the cranberry filling mixture
- Spoon or scoop – For shaping the filling into small round bites
- Baking sheet – To line and chill the bites as they firm up
- Parchment paper – Prevents sticking and makes cleanup easier
- Microwave-safe bowl – For melting the chocolate coating
- Fork or dipping tool – To easily coat the bites in melted chocolate

“Cook and bake with love. Taste as you go, and make every recipe your own.”
Instructions
Step 1: Make the Filling
I start by mixing cranberry sauce, softened cream cheese, and either crushed nuts or crispy rice in a bowl. I stir until it comes together into a thick, scoopable texture.
Step 2: Form into Balls
Using a small spoon or cookie scoop, I shape the mixture into bite-sized balls. Then I place them on a parchment-lined tray and chill them in the freezer for 20–30 minutes to firm up.
Step 3: Melt the Chocolate
While the bites are chilling, I melt the chocolate chips and coconut oil in a microwave-safe bowl. I heat in 15-second intervals, stirring in between, until smooth and glossy.
Step 4: Dip and Coat
Once the cranberry balls are firm, I use a fork to dip each one into the melted chocolate and coat it completely. Then I let any excess drip off before placing them back on the tray.
Step 5: Garnish and Set
While the chocolate is still wet, I sprinkle with a bit of sea salt or chopped herbs for contrast. Then I chill them in the fridge until the chocolate is fully set.
Step 6: Serve and Enjoy
These bites are best served slightly chilled. I arrange them on a pretty plate and watch them disappear at every party!
📌 Love Home Recipes? Follow Me on Pinterest!
Join thousands of others for daily Sweet home Recipes and creative ideas.
Follow Me on PinterestTips
I use leftover whole berry cranberry sauce but you can also use fresh if you prefer
Adding crispy rice makes them light and crunchy while nuts add richness
A bit of orange zest in the filling gives a citrusy holiday vibe
Don’t skip chilling the filling or they’ll be too soft to dip properly
Ways to Serve
On a holiday dessert platter next to cookies and truffles
As a sweet treat after dinner or with coffee
Packaged in mini cupcake liners as edible holiday gifts
Frequently Asked Questions
Can I use jellied cranberry sauce for Chocolate Covered Cranberry Sauce?
Yes! Just make sure to mix it with something like cream cheese or crushed nuts to help it hold its shape.
How long do Chocolate Covered Cranberry Sauce bites last?
You can store them in the fridge for up to 5 days in an airtight container.
Can I freeze Chocolate Covered Cranberry Sauce bites?
Absolutely. Just thaw them in the fridge for about 30 minutes before serving for the best texture.
See You in the Kitchen
I hope you try these Chocolate Covered Cranberry Sauce bites soon! They’re a deliciously creative way to transform leftovers into something new and delightful. If you make them let me know how they turned out or share your twist on the recipe.
Happy Cooking!
Print
Chocolate Covered Cranberry Sauce
- Total Time: 50 minutes (includes chilling)
- Yield: 20 bites
- Diet: Vegetarian
Description
Need easy dessert ideas? These chocolate covered cranberry sauce bites are quick, simple, and perfect for holiday leftovers! Whether you want the best snack for gifting or a healthy-ish sweet treat, this recipe delivers. Great for festive gatherings, easy to freeze, and beginner-friendly!
Ingredients
- 1 cup cranberry sauce (whole berry preferred)
- 4 oz cream cheese (softened)
- 1/2 cup crushed nuts or crispy rice cereal
- 1 cup chocolate chips (milk or dark)
- 1 tablespoon coconut oil
- Optional: sea salt or chopped herbs for garnish
Instructions
- In a bowl, mix cranberry sauce, cream cheese, and crushed nuts or cereal until combined.
- Shape into small balls and place on a parchment-lined tray.
- Freeze for 20–30 minutes until firm.
- Melt chocolate chips with coconut oil in a microwave-safe bowl, stirring every 15 seconds until smooth.
- Dip each cranberry ball into melted chocolate, let excess drip off, and return to tray.
- Sprinkle with sea salt or herbs if desired.
- Chill until chocolate sets and serve!
Notes
- Use leftover cranberry sauce for zero waste.
- Orange zest adds a fresh flavor twist.
- Chill the bites before dipping to keep their shape.
- Store in fridge or freezer depending on when you want to serve them.
- Prep Time: 20 minutes
- Cook Time: 0 minutes
- Category: Dessert
- Method: No-Bake
- Cuisine: American