
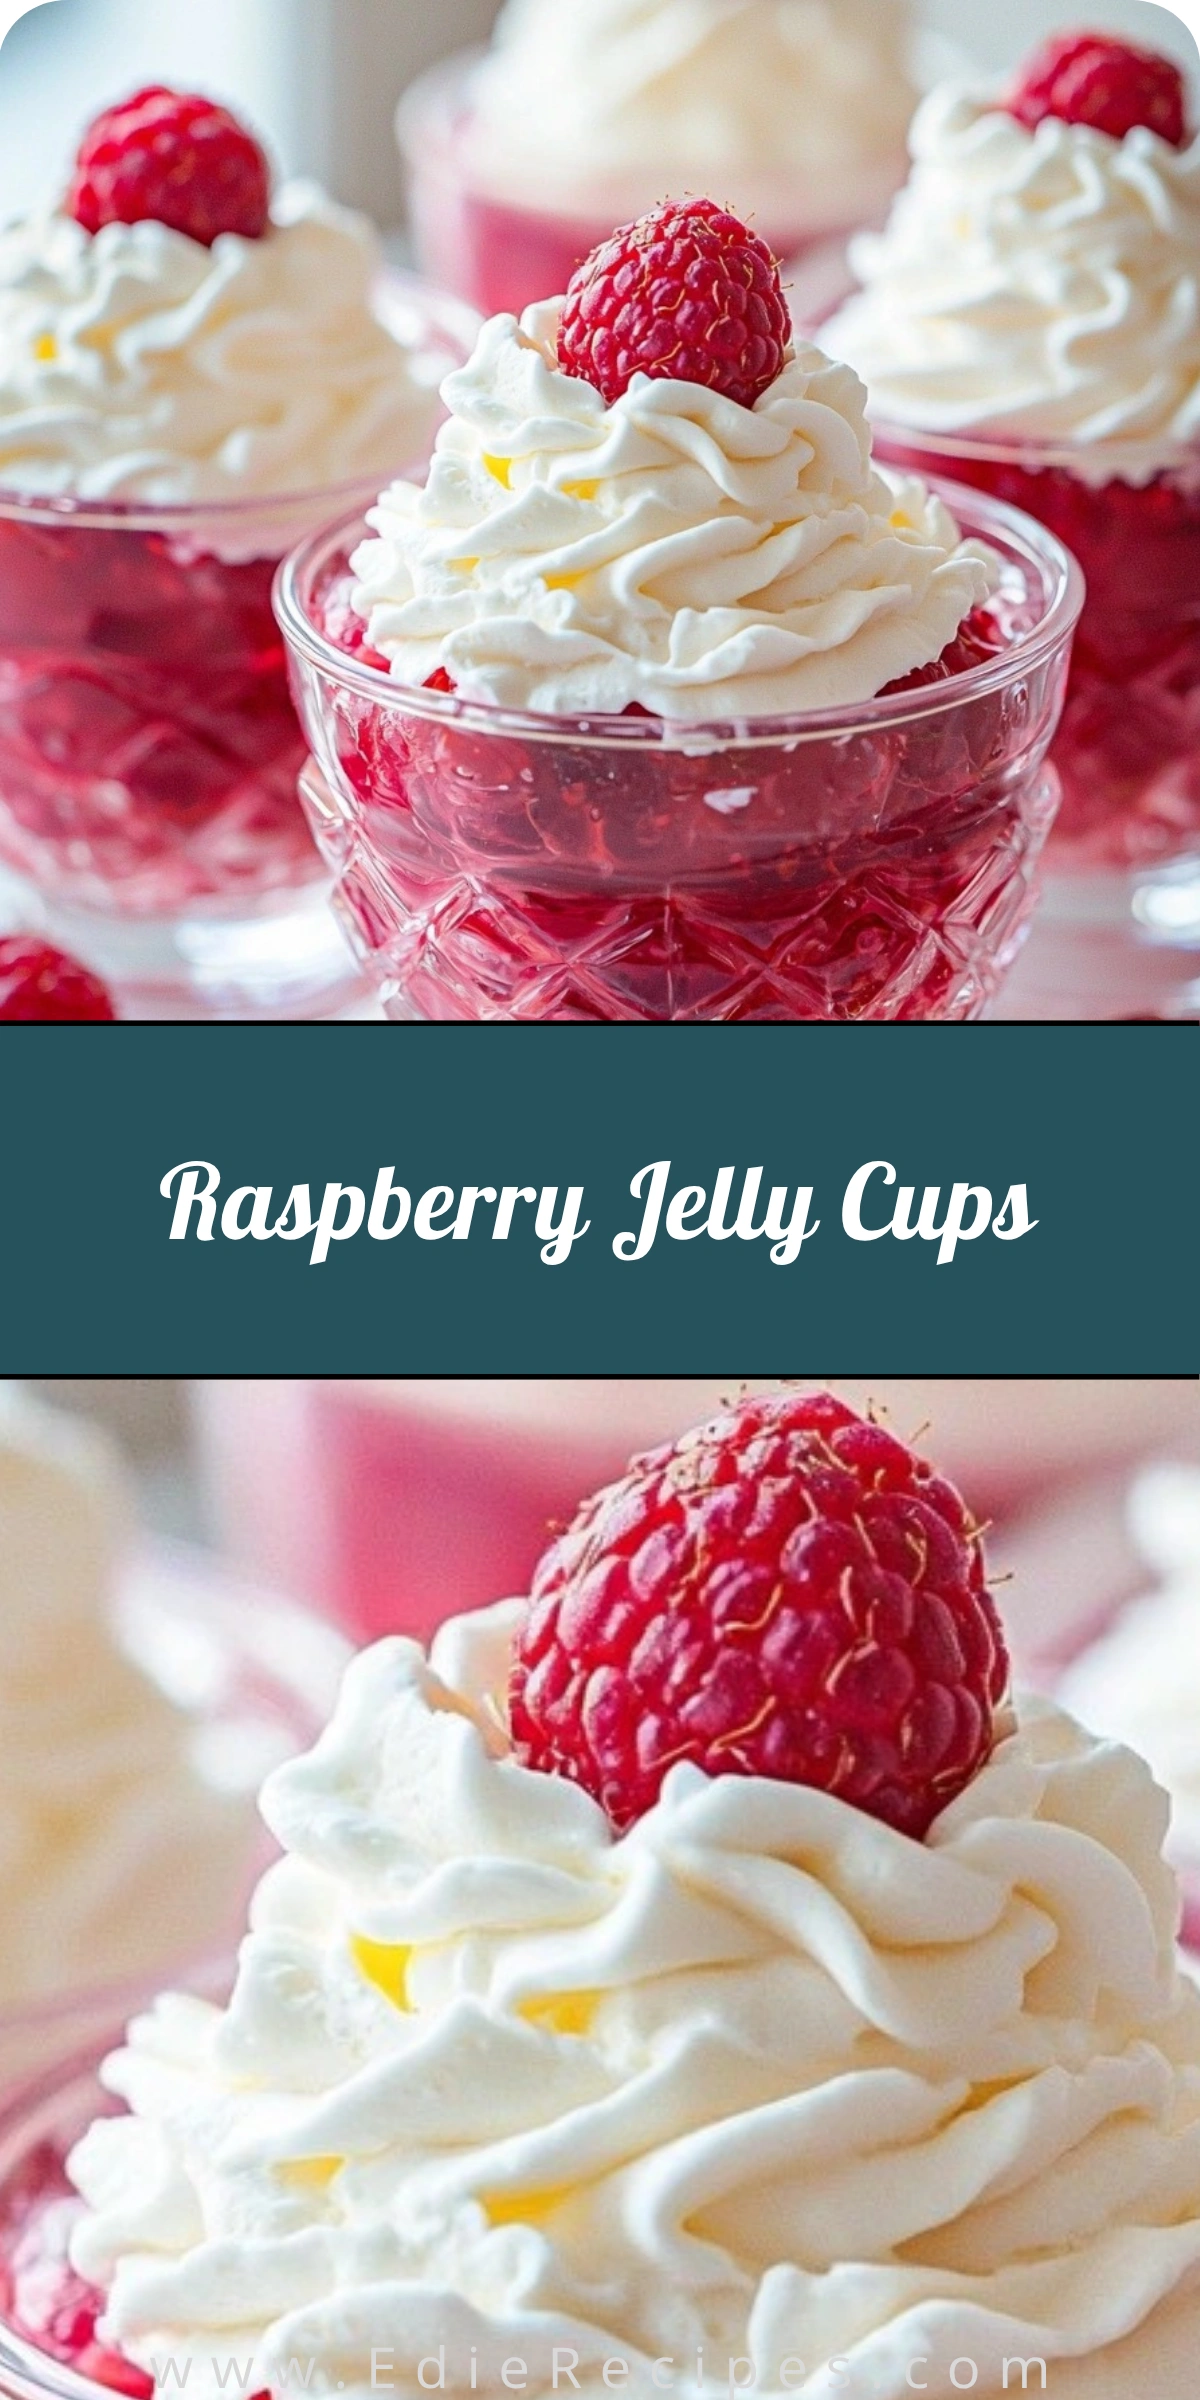
Raspberry jelly cups became my sweet little obsession after a summer garden party where a friend served them in vintage glassware and the way the sunlight hit those ruby-red layers instantly stole the show. Raspberry jelly cups were light cool and delightfully sweet with a pop of whipped cream on top and after just one bite I knew they were going to be a regular treat in my fridge.
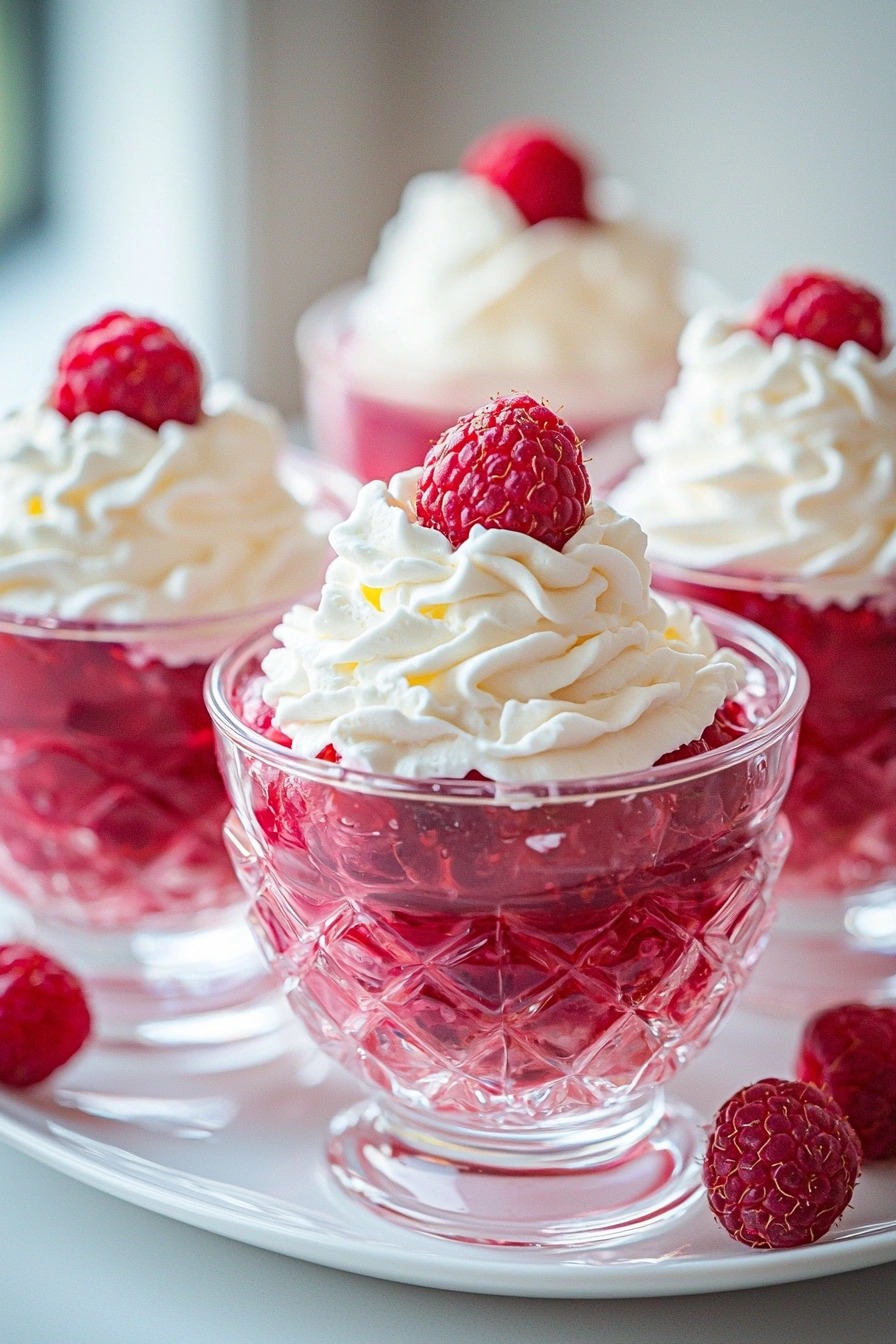
Now I make them for everything from birthdays to lazy Sundays and I love how they’re both playful and elegant. The bright tartness of the raspberries mixed with the smooth jelly texture is refreshing and satisfying and it doesn’t hurt that they’re so easy to prepare and make ahead for any celebration or afternoon craving.
Ingredients :
Here’s what I use for this recipe. You can always make substitutions if you prefer!
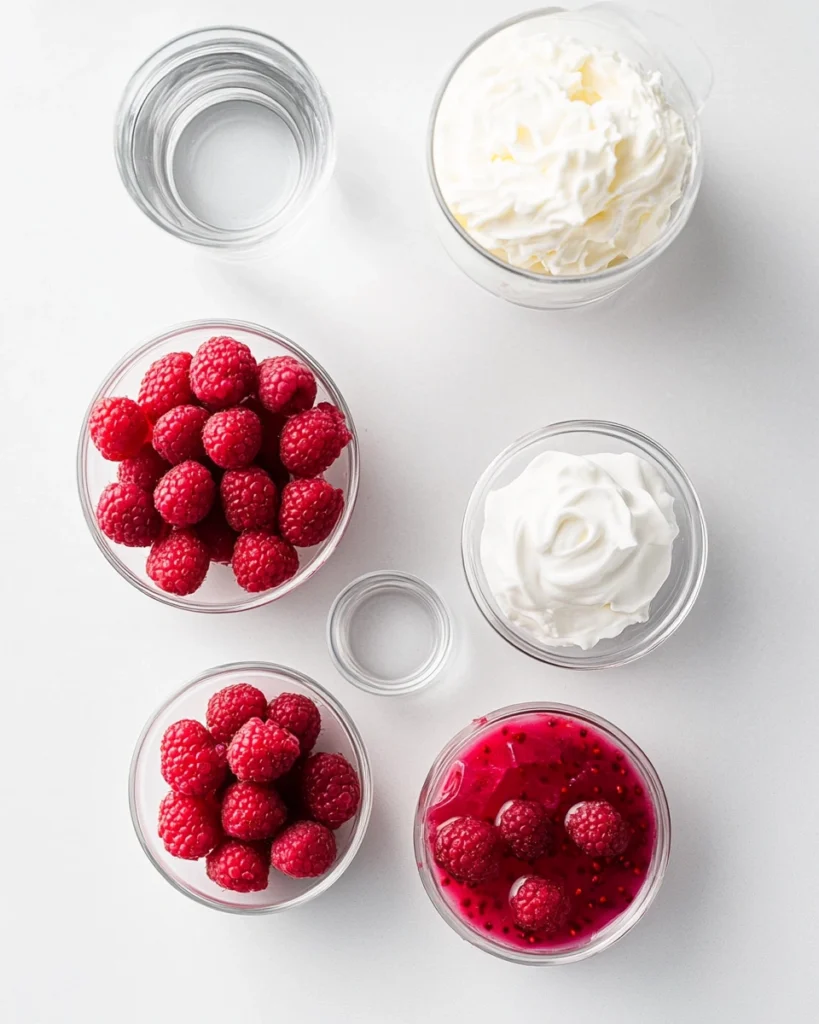
- Fresh raspberries – The fruity star of the show adding natural sweetness and vibrant flavor.
- Raspberry gelatin – Forms the base of the jelly layer and delivers that perfect jiggle.
- Boiling water – Helps dissolve the gelatin completely and activates the mix.
- Cold water – Helps set the jelly properly and cools it down for chilling.
- Whipped cream – Adds lightness and creamy contrast to the fruity layer.
- Mint leaves – Optional garnish for a fresh and pretty finish.
Tools You’ll Need
- Mixing bowl – For dissolving and mixing the gelatin with water.
- Whisk or spoon – To stir the gelatin until fully dissolved.
- Measuring cup – For pouring accurate amounts of boiling and cold water.
- Serving cups or dessert glasses – Ideal for showcasing those jewel-like layers.
- Refrigerator – Essential for setting the jelly perfectly before serving.
- Piping bag or spoon – For topping with whipped cream neatly.
“Cook and bake with love. Taste as you go, and make every recipe your own.”
Instructions
Step 1: Dissolve the Gelatin
I start by adding the raspberry gelatin powder to a mixing bowl and pouring in the boiling water. I whisk it thoroughly until every bit of gelatin has dissolved.
Step 2: Add Cold Water
Next, I stir in the cold water to bring the mixture to a cooler temperature. This step helps the jelly set evenly and not separate.
Step 3: Pour into Cups
I drop a few fresh raspberries into each dessert cup and then pour the gelatin mixture over them. I make sure the berries are evenly spaced for the prettiest look.
Step 4: Chill to Set
I place the cups in the fridge for at least 2–3 hours or until the jelly is fully set and firm. Sometimes I leave them overnight to be extra sure.
Step 5: Add Toppings
Just before serving, I pipe or spoon whipped cream on top of each cup and finish with a fresh raspberry and a sprig of mint for a sweet little touch.
📌 Love Home Recipes? Follow Me on Pinterest!
Join thousands of others for daily Sweet home Recipes and creative ideas.
Follow Me on PinterestTips
If you want to make it extra special, try using homemade whipped cream with a hint of vanilla or almond extract. You can also layer the jelly with yogurt or vanilla pudding for a creamy surprise. To keep the berries from floating, I chill the jelly just a little before adding them so they stay in place better. For an adult twist, you can even swap a splash of the cold water with raspberry liqueur.
Ways to Serve
Serve chilled at summer barbecues or poolside gatherings.
Add to dessert tables at baby showers or garden parties.
Layer with granola and yogurt for a fun breakfast treat.
Use heart-shaped molds or cups for Valentine’s Day or anniversaries.
Frequently Asked Questions
Can I use frozen raspberries in raspberry jelly cups?
Yes you can but I prefer thawing and draining them first to prevent excess water in the jelly.
How far ahead can I make them?
You can prepare these up to two days in advance and keep them chilled until ready to serve.
Can I use other types of fruit gelatin?
Absolutely! Strawberry, cherry, or even lemon gelatin pairs well with raspberries too.
Do raspberry jelly cups need to be refrigerated?
Yes they need to stay chilled for both setting and serving—especially if you’re adding whipped cream.
See You in the Kitchen
I hope you give these raspberry jelly cups a try! They’re simple, vibrant, and a breeze to make plus they look so elegant on any table. Let me know how yours turn out and don’t forget to save this sweet little recipe for your next gathering or cozy treat night.
Happy Cooking!
Print
Raspberry Jelly Cups
- Total Time: 3 hours (including chill time)
- Yield: 4 cups
- Diet: Low Calorie
Description
Looking for the best raspberry jelly cups recipe? These easy, quick, and healthy treats are perfect for any party or snack time. A simple and elegant dessert idea with fresh berries and whipped cream great for summer, holidays, or make-ahead fun!
Ingredients
- 1 package raspberry gelatin (3 oz)
- 1 cup boiling water
- 1 cup cold water
- 1 cup fresh raspberries
- Whipped cream, for topping
- Fresh mint leaves, optional for garnish
Instructions
- Dissolve raspberry gelatin in boiling water, stir until completely dissolved.
- Add cold water and stir to combine.
- Place raspberries in serving cups and pour in the gelatin mixture.
- Refrigerate for 2–3 hours or until fully set.
- Top with whipped cream and garnish with a raspberry and mint leaf before serving.
Notes
- Chill slightly before adding berries to prevent floating.
- Use homemade whipped cream for extra flavor.
- Add a splash of liqueur for an adult version.
- Can be made 1–2 days ahead and stored in the fridge.
- Prep Time: 10 minutes
- Cook Time: 0 minutes
- Category: Dessert
- Method: Chilled
- Cuisine: American